ECGR4124 Project 1, Introduction to NetBeans Interface

Form groups of 3.  Members of any group must be all graduate or all undergrad.
Students unfamilair with java or C or C++ should join groups of 2 having at least one person familiar with C or C++.
Students not in a group will be randomly assigned to groups.

Comments on installations on your home PC /Mac for 2019:
Use the "Write png" button on DSPsoundv55a for saving printouts for your project reports. 
Do NOT use "zoom" feature on any plots unless specifically requested.
It would be VERY ADVISABLE to copy/paste plots into your report as you proceed.
See the project report template below.


To greatly speed up execution: At first, your project will run slowly, because we will need to access some files that are written slowly over the afs network file system.  Later, we will disable the slow file-writing commands, and your program should run much more quickly.

Project 1 introduces Java/NetBeans concepts and introduces a core Java class, "Myclass," that you must use to implement your projects. This Java class includes methods/functions for basic constructors, file access, equal, FFT, and addition functions. In 
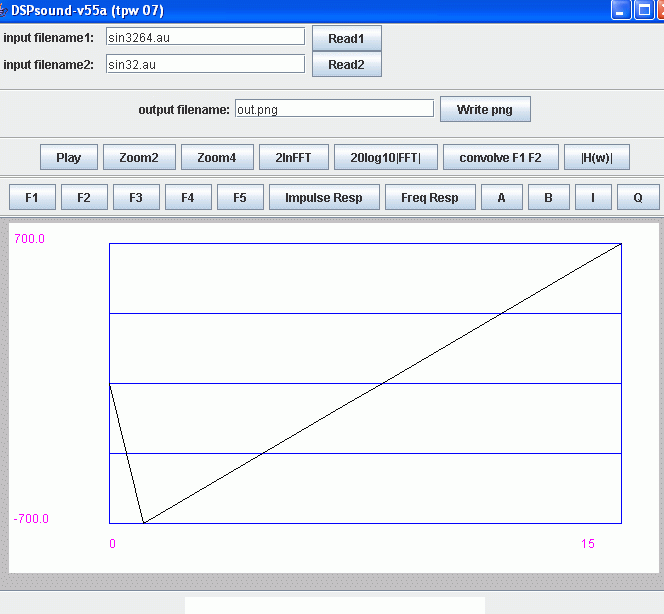
addition, a NetBeans graphical user interface called DSPsoundv55a is also provided ( snapshot of DSPsoundv55a ) .  You will be asked to implement DSP tasks by adding functionality to different buttons in the graphical interface.  

Preparation

  • Netbeans should be available on the campus PC or linux system
  • Create a new directory for this course (ee4124) if you have not already done so.
  • Download the DSPsoundv55a project interface, as described on the  DSP for Java/NetBeans Java/Netbeans Tutorial web-page.
  • This may not be true any more:  In spring 09, it appears that  the filesystem has problems finding files in "Mydocuments" or "desktop" so it may be best to create your directories on your PC or linux drive. 
  • This may not be true any more: In the past, on the campus PC or linux system, when you have downloaded the DSPsoundv55a project interface, run the NetBeans 5.5 program, or a later version (Start>AllPrograms>MosaicXp>Programming>Netbeans>NetBeans55) You may skip the "JUnit Library" install if it pops up when you run NetBeans.
  • This may not be true any more: In the past, on the campus filesystem you must only work in the U:\pc\win_data drive, otherwise you will not be able to properly open/save the project.  It is safer (less bugs) to read/write to the U: drive than "MyDocuments"
  • In Netbeans, use the menu-bar command File->OpenProject as shown below to navigate and open the DSPsoundv55a project in your new folder  (NetBeans>File>OpenProject ) (In some versions of NetBeans, the "open as main project" field should be highlighted when you select DSPsoundv55a) 
  • xx


    Project

  • Preliminaries:
  • Navigate down through the project hierarchy and right-click-open Myclass.java as illustrated below
  • x
  • Look at the contents of Myclass.java, this is the class that you will build upon. The navigator pane shown below allows you to select source code for each class method/function  by double-clicking the function.  In the figure below, double-clicking the default constructor Myclass() access the source code shown to the right in the figure.
  • x
  • The class data members consists of a byte data array "data" for byte data, a pair of floating point arrays "re" (real), and "im" (imaginary), and an integer "n" specifying the size of the arrays.
  • Class method/function "equals" implements the "=" function
  • Class method/function "fft" implements an fft
  • Class method/function plus(Myclass x) adds two Myclass objects
  • Class method/function plus(int x) adds an integer to a Myclass object  (only adds to real part array)
  • Methods/unctions "readraw" and "writeraw" are the functions that can be used to read/write ascii-text files of data
    • The raw data written to f1.txt, f2txt, and disp.txt is ascii-format, 2-columns, corresponding to the real (re) and imaginary (im) data. The char array (data) is not printed to the files; this is used internally only for purposes of display and translation to au format.
  • Look at other functions that have been provided
  • Open the main project interface builder panel by opening the file shown below
  • Select the "Design tab to see the source (see red arrows below).
  • You can right-click any button and select events to take you to the code execution associated with the button
  • You can add new buttons/sliders/etc by dragging them from the right pane
  • You can get back to the original MyClass code by clicking the tab at the blue arrow
  • xx

  • Understanding what happens in DSPsoundv55a:
    • When a button is pressed in DSPsoundv55a, the code associate with that button is executed.
    • For example, select the "DSPsoundv55aUI" tab in the source/design area, and select the "Design" view.
    • Left-click the F2 button and select Events>Mouse>MouseClicked to access the source code as shown below
    • x
  • Project tasks:
  • Use the "Write png" button on DSPsoundv55a to create printouts.  This button will save a "png" graphics file for your reports.  Name the file appropriately.  Make sure that your word-processor can read/display png graphics files. Do not print out an illegible image in your reports.  Scale the image for readability, if needed.  It would be best  paste the IMAGES in the project report as you gather them (see the project report template below).
  • In most images/plots, there are numbers on the axes (as illustrated below) that are important for you to get full credit for your work.  Make sure that the numbers/axes are not lost or illegible in all the plots.
  • xx
  • By far, using the "Write png" button for saving PNG files is the safest way to avoid losing points for illegible figures in your reports, so use the "Write png" button.   Under extremely unusual circumstances,  you may need to capture the printouts using a snapshot/paint/xv program, but your group remains responsible for creating sharp legible images, under all circumstance.
  • Write your answers to any questions on a seperate answer sheet as described in the report requirements below, 2 or 3 sentences should suffice for most explanations.
  • Get the basic program running.
    •  Run "NetBeans>Run>CleanAndBuildMainProject"  to build the program,
    • Then "NetBeans>Run>RunProject" to run the program  (this option may be blanked out, if you already are running a copy of the project)
  • From the running DSPsoundv55a interface, load audio file sin3264.au  (click Read1).  Most audio files should already be in your directory, so you should not need to download the audio file.
  • Note the min and max values of the plot (the "plot range" of the plot). 
  • Also, note that the x-axis corresponds to the number of time-point samples (2048) in the audio file.
  • All audio files in the course are sampled at 8000 samples/second.
  • Next, press the "F1"  button 2 times in succession and print the result (print the whole waveform window area), and hand it in ( P1 ).  Use the "Write png" button on DSPsoundv55a for saving printouts for your project reports.  Do NOT use "zoom" feature on any plots unless specifically requested.
  • Repeat the process, reading in the file once again, but taking care to observe the plotted data and "plot range" as you proceed. Explain the result displayed on the interface (minimum and maximum vertical axis values) in terms of the source code attached to the F1 button ( Q1 ).  Note that the dispData variable is used in the DSPsoundv55aUI.java interface to store the data that is being displayed. 
  • A key to understanding the projects is that anything you store in the dispData variable will be displayed on the plot area. 
  • Similarly, the variables inData1 and inData2 are used to store the data that is loaded into memory when the Read1 and Read2 buttons are pressed.  Note: no data is loaded until the read buttons are pressed!  The DSPsoundv55aUI.java code declaring the variables is shown below.  Note that all three variables are declared as Myclass variables.
  • x
  • After completing the task of pressing the "F1" button twice, observe the contents of files f1.txt and disp.txt.   Print out the first 10 lines of each file, and hand this in as a single figure/graphic/plot (use a screen snapshot utility for this)  ( P2 ). (Even though this is text, use "prtScr" and paint, or ksnapshot, or other tools to save a snapshot as a plot for P2 ... crop it so it is readable).  As you observe the data, note that the  data in the files correspond to what is displayed in the plot window of DSPsoundv55a. (Also note: a function button must be pressed tin order to cause the latest data to be loaded into f1.txt.)
  • To greatly speed up execution on some older systems, you may comment out the following three lines in method refreshdisplay() of  DSPsoundv55aUI.java.  However, this trick will disable the writing of the data files f1.txt, f2.txt, and disp.txt.  It seems that some older MOSAIC afs file-systems are very slow when these fies are written, for some reason.
  •        // inData1.writeraw("f1.txt");
           // inData2.writeraw("f2.txt");
           // dispData.writeraw("disp.txt");
  • Experiment with the zoom buttons to view magnified versions of the beginning of the signals.
  • Modify the program to create a new Myclass function to divide by a float constant. Use a new Myclass method "divide(float x)."  The form of the Myclass method should be similar to the Myclass "plus(int x)" method, except that both real and imaginary arrays should be divided.  Copy the "plus(int x)" method and edit it to create your new method. It would be wise to prevent divide by zero.  Hand in the java code for "divide(float x)." ( Q2 ) Turn in ONLY the source code for your divide function (NOT ANYTHING ELSE!!")  For example, you might turn in the following for "plus"
  • Use the above Myclass method "divide(float x)" to divide the dispData display data by two, using the F2 button to implement this.  Read the divide the sin3264.au file, then use the F2 button to divide the displayed data by 2, and print the display of the "divided" result out, and hand it in ( P3 ).   Hint: "2.0f" is a float 2.0 value.  Also, look at F1 button implementation for an implementation example.
  • Use the above Myclass method "divide(float x)" to divide file1 and file2 by two, then add the two signals together (use the inData1 and inData2 variables to access the file data, after using the Read1 and read2 buttons to read the data files). Use the F3 button to implement this.  Print results using this new F3 button function for the two files sin3264.au and rand5.au ( P4 ).
  • Write code to square the displayed signal. Load sin3264.au. Use the F4 button for this implementation. Print this out, and hand it in ( P5 ).
  • What famous 1971 integrated circuit has Federico Faggin's initials, and what was the function this circuit ( Q3 )?
  • Put the plot numbers on each plot, and number all questions in the report. (i.e., P1, P2, P3..., Q1, Q2,... )
    Place answers to all questions on one or more consequitive sheets of paper at the front of the report labeled Q1, Q2, etc.
    Include only the code for your "divide(float x)" method/function (NOT ANY OTHER CODE!!")
  • Report

    Use the Project Report Template  (also shown as pdf file)

  • Include the plot numbers P1, P2, etc in captions, along with a short description!
    Write a cover sheet + 1 page executive summary ONLY!!!  Describe any unresolved issues.
    Place answers to all questions on one or more consequitive sheets of paper at the front of the report!
    Do NOT scatter the question answer sheets throughout the report, keep them together
    Do NOT use "zoom" feature on any plots unless specifically requested.
    Make sure that you include question numbers and plot numbers on all sheets!
    I will only look on the question answer-sheets for any discussion.
    All extraneous material WILL BE IGNORED!
    Do not write any discussion, except directly on the question answer-sheets or 1 page summary.
    Do not add extraneous pages.
    Do not put explanations on plots unless specifically directed to do so.
    Include any problems or unresolved issues in the summary.
     For this project, turn in source code ONLY for your overloaded divide function (NOT ANYTHING ELSE!!")
     Include any problems or unresolved issues in the summary.
    Copyright 2009-2015 T.P. Weldon